Pages

Tuesday, 14 October 2014

Runway inspired challenge 69

I really enjoyed making a card for the runway inspired challenge last time so I've decided to have another go at it. It's fun to have such an unrelated object as inspiration, and this challenge was no exception.
I stamped and then masked off the edge of the black on the left before adding in the yellow texture. I then rubbed off the frisket, and masked the other side to stamp the rest of the card. I then went over the swirl stamp with markers and white gel pen before bending and stamping the sentiment in black.
The whole white piece was then attached to some kraft card stock.


Before and after

I thought I'd put up a pic of a person that I coloured at the start and the end of the class, as a visual of my improvement, and as a thankyou to my teachers. Look what you did, teachers!
Well done.
At the beginning I had only six copics, so I can only show you this unfortunate fellow's face and hair. The rest I stamped onto patterned paper. Can you spot the big fix I had to do? The poor boy has an odd shaped head.

Here's an after. I can see lots of mistakes, and I have a long way to go, but what a difference! This image is from Anna Stillwell at cuddlebug cuties. Here.
So thanks, ladies. You've taught me a lot.


I've now got me a little collection of copics!

I have earned my copic markers with blood sweat and tears. I have shovelled three truckloads of dirt and several trailer loads of rocks and mulch at the measly rate of two copics per hour for up to nine hours a day of late. I'm almost too tired to play with them at night!
When the digger got bogged, and husband got the flu, the job of shovelling fell to me. Having a reward of guilt free craft purchases was enough to keep me going, and I've built up a collection now, which I really feel I've earned! Actually, Mr Gorgeous would have let me buy whatever I wanted, but as I'm a stay at home mum (mostly) I don't feel that I should spent big, so it was the guilt free part of the arrangement that I really loved.
I have three of these little containers with copics in them. Two came from office works, and one from Ikea, all stacked with little collections of markers. 
Here's what I did to label them:
I cut out the numbers from the class download sheet with the smallest circle in my die set, and stuck the numbers on with glossy accents, then added another generous coat of glossy accents on top. The labels feel very sturdy. 

And yay me for all that digging! (If I do say so myself)


Copics, Day ten. Finishing touches

Lots of information today about jazzing up images once they've been coloured. I haven't tried everything in this class yet, but  I did have a go at white embossing over the image.
I really like this card. This is my style.

Copic backgrounds

I'm still posting the work I did as part of the Copics for cardmakers class.
Day nine was about backgrounds, and this was yet another useful one for me.
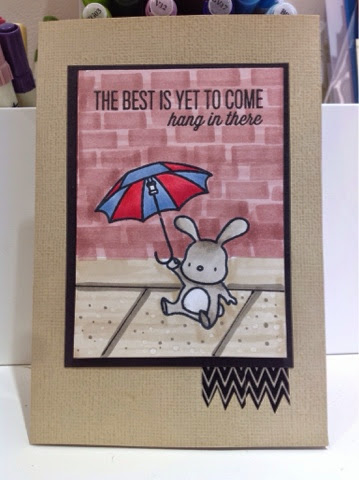
I even had one of the colours used in the brick wall example and didn't have to make substitutions, a rarity for me. Now my images look much more finished. I LOVE the clouds. I'm so glad I know how to do those now.


Cards using copics for cardmakers images


It was great to see what the teachers did with the images that we've been colouring. Because I've never done this kind of thing before, I didn't know what I should do with the images. Plenty, as it turns it! Here are my attempts.


Copic class, day six

Cute critters today, with some fancy colourless blender work to make fur. I've never really thought about fur before, so this was a good day.
Thanks for the lesson, ladies!