Pages

Tuesday 14 October 2014

Runway inspired challenge 69

I really enjoyed making a card for the runway inspired challenge last time so I've decided to have another go at it. It's fun to have such an unrelated object as inspiration, and this challenge was no exception.
I stamped and then masked off the edge of the black on the left before adding in the yellow texture. I then rubbed off the frisket, and masked the other side to stamp the rest of the card. I then went over the swirl stamp with markers and white gel pen before bending and stamping the sentiment in black.
The whole white piece was then attached to some kraft card stock.


Before and after

I thought I'd put up a pic of a person that I coloured at the start and the end of the class, as a visual of my improvement, and as a thankyou to my teachers. Look what you did, teachers!
Well done.
At the beginning I had only six copics, so I can only show you this unfortunate fellow's face and hair. The rest I stamped onto patterned paper. Can you spot the big fix I had to do? The poor boy has an odd shaped head.

Here's an after. I can see lots of mistakes, and I have a long way to go, but what a difference! This image is from Anna Stillwell at cuddlebug cuties. Here.
So thanks, ladies. You've taught me a lot.


I've now got me a little collection of copics!

I have earned my copic markers with blood sweat and tears. I have shovelled three truckloads of dirt and several trailer loads of rocks and mulch at the measly rate of two copics per hour for up to nine hours a day of late. I'm almost too tired to play with them at night!
When the digger got bogged, and husband got the flu, the job of shovelling fell to me. Having a reward of guilt free craft purchases was enough to keep me going, and I've built up a collection now, which I really feel I've earned! Actually, Mr Gorgeous would have let me buy whatever I wanted, but as I'm a stay at home mum (mostly) I don't feel that I should spent big, so it was the guilt free part of the arrangement that I really loved.
I have three of these little containers with copics in them. Two came from office works, and one from Ikea, all stacked with little collections of markers. 
Here's what I did to label them:
I cut out the numbers from the class download sheet with the smallest circle in my die set, and stuck the numbers on with glossy accents, then added another generous coat of glossy accents on top. The labels feel very sturdy. 

And yay me for all that digging! (If I do say so myself)


Copics, Day ten. Finishing touches

Lots of information today about jazzing up images once they've been coloured. I haven't tried everything in this class yet, but  I did have a go at white embossing over the image.
I really like this card. This is my style.

Copic backgrounds

I'm still posting the work I did as part of the Copics for cardmakers class.
Day nine was about backgrounds, and this was yet another useful one for me.
I even had one of the colours used in the brick wall example and didn't have to make substitutions, a rarity for me. Now my images look much more finished. I LOVE the clouds. I'm so glad I know how to do those now.


Cards using copics for cardmakers images


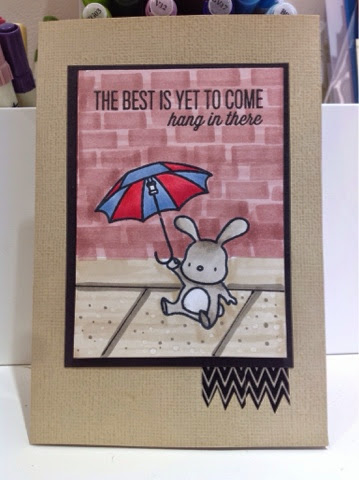
It was great to see what the teachers did with the images that we've been colouring. Because I've never done this kind of thing before, I didn't know what I should do with the images. Plenty, as it turns it! Here are my attempts.


Copic class, day six

Cute critters today, with some fancy colourless blender work to make fur. I've never really thought about fur before, so this was a good day.
Thanks for the lesson, ladies!

Sunday 12 October 2014

Copic markers day five


My favourite lesson. I loved, loved, loved learning about faces and hair, and Kathy Racoosin's dress completely changed the way I think about adding colour. I love Kristina's hair lesson too. 
Here's my ballerina girl, pretty dress, nose and all. Her hair is yet to be coloured.
Here's another that I mounted onto a card.


Copic markers, day four

Thanks to Sandy Allnock and Jennifer Macguire, I finally understand a bit more about light sources, and highlights. I've coloured two images here, one using the ideas shown by each of the two ladies. Can you guess which is which? Sandy had the light from the side, and in the one where I used Jennifer's technique, I put myself as the source of all light (something I'm telling my husband often!)

Copic markers, day three

There are some things, like cryptic crossword clues, that are utterly obvious once you see them, but not before.
Such is the idea of using grey to shade. Wow! Why didn't I think of that?
I also had a go at a watercolour background around this image, but it wasn't successful.
You live, you learn.

Tuesday 7 October 2014

Copic markers day two

http://onlinecardclasses.com/copic/wp-content/uploads/2014/09/COPIC_participant.png

Day two was the perfect class for someone with such a small collection of markers as myself. It was how to blend non similar colours. I certainly had those. We played with butterflies and birds, and learnt tricks for making the colours flow. As you can see, I had to do a lot of marker cleaning on the side!


Copic markers day one

I've owned the grand total of six copic markers for a while now. Three for face, three for hair. All my people had exactly the same colouring! Anyway, I decided to do a copic colouring class through online card classes. I think they're really good value for money -at least they would be, if they didn't always set me to shopping.
http://onlinecardclasses.com/copic
I'm not one that needs everything the class uses, but clearly six copics wasn't going to cut it, so I bought 12 more, in pairs of blending colours.
Day one had me colouring balloons and presents. I already learnt a heap about drawing shadows, and blending. Here's the result of my play.
I really must work on staying in the lines!

Tuesday 16 September 2014

First challenge success!


I entered my very first challenge last week. Perhaps they wanted to encourage me on my first try, but either way, I got selected as a "fabulous fashionista". Hilarious if you could see how I dress most days, but so exciting nonetheless.
I'm inspired to have a go at more challenges now, and not be so apologetic about my cards.
I've also been making a few more cards. This one has been sent to my nephew who celebrates his 17th birthday on the other side of Australia.

Thursday 4 September 2014

Runway inspired challenge

Well, this is my first time to get brave and enter a challenge, and I'm a little unsure about what I'm doing, but when I saw the lovely combination of florals with black and white on the runway, I knew what I wanted to do. So, here it is. My take on the runway inspired challenge number 67. Hope you like it!
I laid down a rough watercolour background before stamping the magnolia image from altenew, and finishing off with a couple of rounded corners and some black and white washi tape.

Tuesday 19 August 2014

Hello friend

To wind up the Stretch Your Stamps class, we had a play day. I however, have been working too hard to play until tonight. I bought some beautiful new shiny threads which I was dying to use, and I got a chance to combine them with the Technique Tuesday 'Hello Friend' stamp and a a wood grain background from Eclectic Images. Here's the result, photographed quickly in a room that's probably a bit too dark, but you can get the general sense. I hope everybody else enjoyed the class as much as I did.

Thursday 14 August 2014

DIY floral builder stamps

I don't own the lovely W+9 floral builder stamps, but I do own a couple of floral stamps, namely paper smooches botanicals 2and simon says stamp favourite flowers.so I grabbed a couple of stamps and stamped like crazy onto scrap paper, and practiced my 'scribbling'. I also don't own the special stamping paper that was used in the online card classes, so my stamps are not smudged, 
BUT, I was able to get almost the same effect all the same.
This really is a lot of fun!


Wednesday 13 August 2014

Ladybird card

I've been getting creative with Avery Elle's rounded diamonds. I was making a border with orange inks, when it reminded me of ladybirds. So I thought I'd give it a red hot go, and this is the result. The eyes and legs are hand drawn, and the spots were stamped with the eraser from the end of a pencil.
Hope you like it!

Tuesday 12 August 2014

Graphic stamps


Cards for boys! That's what I see when I look at this stamp. Having said that, two of the cards I made today are definitely quite girly.
Firstly, here's  a card I made before classes started. It took me ages to decide which way up this print should go. If you look at it up side down, you get a completely different view. Try it!
I made two cards using Laura Bassen's idea. On the first one, I used the rough side of a linen paper to give me the broken lines. I pressed lightly, and left the stamp on for a few seconds for the ink to soak in. I  would have liked the blue on the right to be more even, but I'm too chicken to go back over it, in case I muck it up!
For the next card, I ran a double line of coordinating washi tape along the top and bottom of the card. This one was stamped onto art spectrum watercolour paper.


Finally, a rather crowded version of Debby Hughes' card. The sentiment is a little Heidi swap one that I picked up cheaply, and then, for the cards above and below, bent almost beyond its ability to cling to the stamp block!
Today's cards were all very quick to make, which was perfect, as I've been wrangling 14 year olds all day, and don't have a lot of my zing left. So after a good sleep, and some more inspiring ideas, who knows what I'll be able to do tomorrow?


Monday 11 August 2014

Outline stamps

Just one card today, made with clearly besotted's fresh flowers. I inked the stamp with distress markers, and stamped before painting over it with water to spread the ink. Again, this was a technique from online card classes' stretch your stamps class.
To construct the card, I made a watercolour swatch in matching colours, and stamped a sentiment from Simon Says Stamp's handwritten borders. I love these soft colours, and I love how quickly and easily this card came together.

Sunday 10 August 2014

Colour me stamps

I absolutely love this stamp from Clearly Besotted, and to tell you the truth I love all flower stamps. All of my cards would have flowers on them if it weren't for having so many men in my life (wow, that sounds bad; I meant husband, sons, father etc....).
So I really am enjoying colouring them these past few days.
Here's one that I attempted to do without edges, only to decide that I really like the edges and fill them I again later! I coloured this with distress inks as paints.
I also had a go at the reverse painting technique where I painted out the inside of the flower to lighten it. I did this on a piece of watercolour stained paper that I had waiting for a card, and Altenew's Magnolias for her stamp.
The online cardmaking classes certainly are getting me going with ideas. I can't wait to branch out with my own ideas that this is giving me, but I want to keep up with the class ideas first. There will be time for my own cards later.


Friday 8 August 2014

Letter and sentiment stamps

The last two lessons of stretch your stamps have been exploring different ways to use alphabets and sentiment stamps. Hurdle number one was to get brave and use scissors on stamps, and cut them into pieces. Very scary indeed, but it did make them a lot easier to use.
I've enjoyed playing, and have come up with the following cards. 

For my family, I made a full set of these to hide under pillows tonight. After stamping the letters in Simon says Stamp inks in Dark Chocolate and Soft Navy, I blended the soft Navy ink in from the sides, leaving the message white.
Lacking pretty much everything to make one of the cards, I came up with this alternative, by cutting out my own stencils. I'm pleased with this one. The stamp is My Favourite Things 'pretty poppies', chopped into pieces.
Finally, a card that I'm glad I ran past my children for comment. I chose letters for the tree the I thought looked a bit branchy and leafy, and they were Y, R, O and S. When the kids looked at the card, they wanted to know why the tree said   'Sorry'. So I hastily added some 8 and P stamps, and now the card isn't quite so apologetic! The grass is made from T, I and 1 stamps as well as !.
The trunk is hand painted with watercolour paints.


Thursday 7 August 2014

Background stamps

I'm still loving the online card class that I've been taking. 
I've done a couple more backgrounds and made them into cards. I feel like a bit of an imposter putting up cards that I've pretty much copied from the instructions, but I like them anyway, and it's good to share with others in the class, so here goes!

I LOVE this first card, courtesy of Laura Sterckx. I will definitely be playing with this idea some more.


This next card takes me back to the types of cards that I used to make years ago when I first started. I love cutting tiles and replacing them, but I haven't done one for ages. I love it!


I had a play with the black paper card too. I just scaped into the supply requirements, owning exactly two colours of perfect pearls. I'm not so sure about this one. My personal style is a bit brighter, I think, but it was a great learning experience, and it's something I could see myself using as part of a card later on, but not as a full card.
Finally I had a little play myself with another background stamp that I own ( the count is up to four now!)
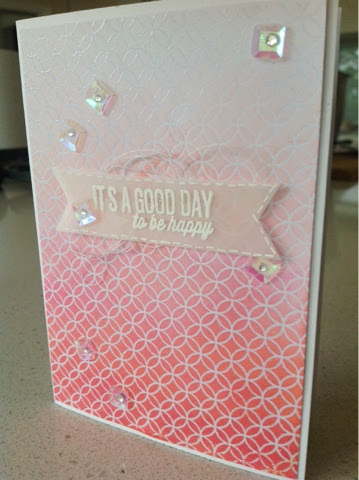
First I used perfect pearls on white card stock, then embossed in clear, with a touch of sparkle. Lastly, I added mustard seed distress ink with a blending tool, to brighten the whole card.


Monday 4 August 2014

Stretching my stamps,

Stretch your stamps class has finally begun. I made myself wash the floor and clean the kitchen before I even looked at a video. And now I've started,  with the watercolour resist background stamp. I don't have exactly the same stamp as they used in class, but I'm happy with how mine turned out, using impression obsession's 'circle fusion'. 

I painted the background first, the painted over the centres of every second row. (Thought about every row, but even I have my limits!) 

I then cut it up and made a couple of cards. Once again, I didn't have the required dies and stamps, but substitution is my middle name, and so I was able to make some very usable cards. The small hearts are from a little technique Tuesday stamp that will appear later in the class.
The second cards is for some dear friends of mine, who were in a crazy freak accident, and have both got broken legs as a result. The three children are OK at least. The sentiment seems a little trite, given the enormity of the challenges they'll be facing, but I hope that coupled with practical help, the card will let them know how much they mean to us, and give them some small encouragement.


Sunday 3 August 2014

Watercolour cards


I've recently done a watercolour card making class. I signed up thanks to a random comment by a friend about the class, and I'm so happy to have rediscovered my love of making cards. I've rediscovered it to such an extent that friends may get cards for as little as sneezing, such is my stash.
I've loved playing with watercolour paints, and especially the distress inks and markers. Here are some of the cards I've been making.


Friday 25 July 2014

Hello!

Well, here I go with another blog. I am a girl of so many interests, and not everybody shares all of them. Not everybody is into self sufficiency, quilting, cooking, music, frugal living, cardmaking, and vegetables all at once. So if you're into homemaking and want to see what I get up to, check out  www.donnaisplayinghouse.wordpress.com and if gardening is your thing, especially self sufficiency and food gardening, have  a look at www.donnadigs.wordpress.com.
Otherwise hang about here and I'll share what I'm getting up to in the craft room.